
Screen savers are here to stay. While they may no longer be a force to be reckoned with on modern displays, they still give a dynamic look to the display that otherwise appears idle. From a personal configuration point of view, it’s hard to replace screen savers with anything else. And if you prefer to use a screen saver on your Mac, you would probably like to make a quick shortcut to start/end it using a simple click or a swift gesture. Follow along to discover three ways to create a screen saver shortcut on Mac, should you find my guessing game spot on.
3 Ways to Make Screen Saver Shortcut on macOS
First up, let’s have a little bit of sneak-peek into what we are going to walk -through. Well, we’ll be using the classy Dock, Hot Corners, and the versatile Automator to make screen saver shortcuts on macOS. Depending on your convenience, you can choose any methods to get started. If you are fond of Dock, a Dock icon could be your thing. But if you like to have a taste of smooth gesture, a hot corner shortcut could well be the right pick for you. As for Automator Quick Action, it may appeal to you, if you love to use quick keyboard shortcuts on your Mac.
Make a Screen Saver Shortcut with a Dock Icon on macOS
First off, we are going to make a screen saver using the Dock icon. The process is quite straightforward.
1. Open the Finder app and then click on the Go menu.
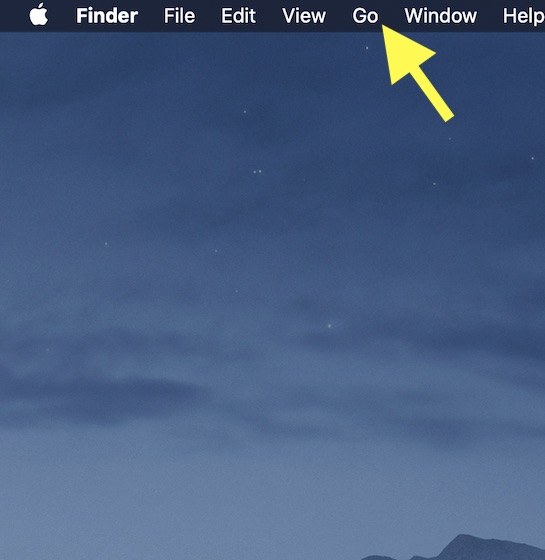
2. Now, click Go to Folder in the menu.
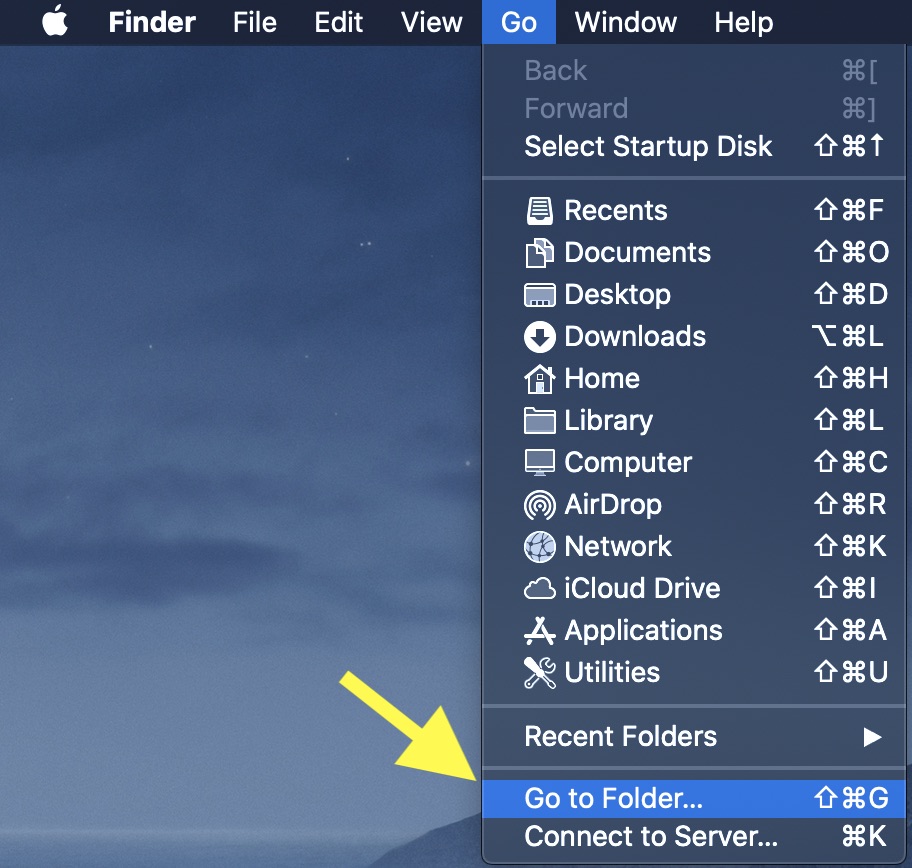
3. Now, paste the below-given location in the box and hit Go.
/System/Library/CoreServices

4. Next, a folder will open on the screen. Locate ScreenSaverEngine and then drag it on the Dock.

Going forward, you can just click on this Dock icon to kickstart the screen saver on your Mac.
![]()
Create Screen Saver Shortcut Using Hot Corners
Making a screen saver using the Hot Corners feature is just as simple. For those unfamiliar, the Hot Corners allow you to start/stop a custom action just by moving the pointer to one of the corners of the Mac screen.
1. Click on the Apple menu at the top left of the screen -> System Preferences -> Desktop & Screen Saver.
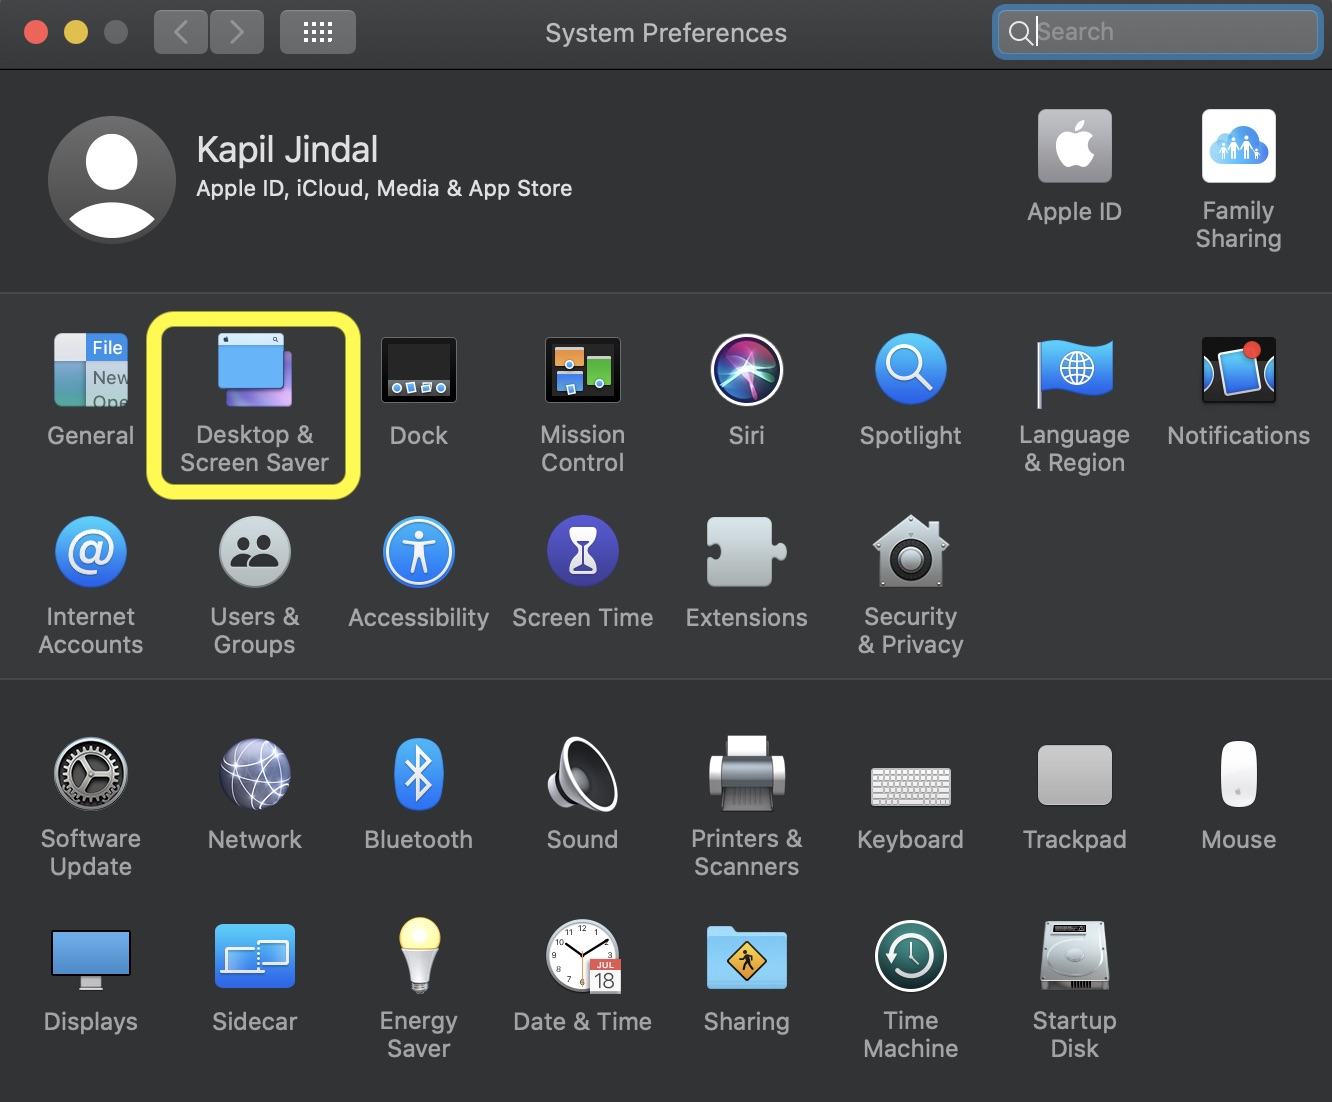
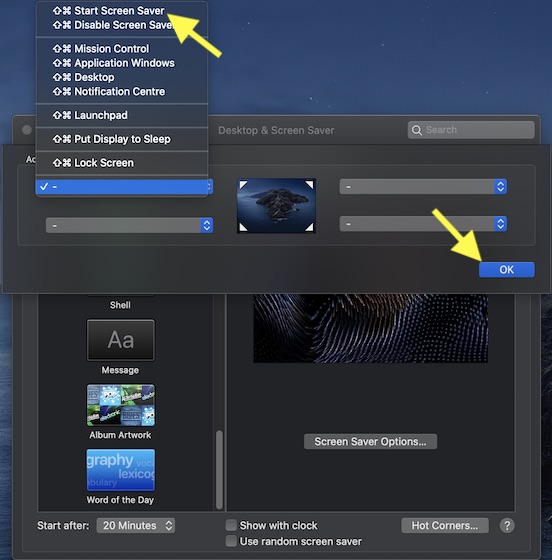
2. Now, click on the Screen Saver tab and choose Hot Corners.
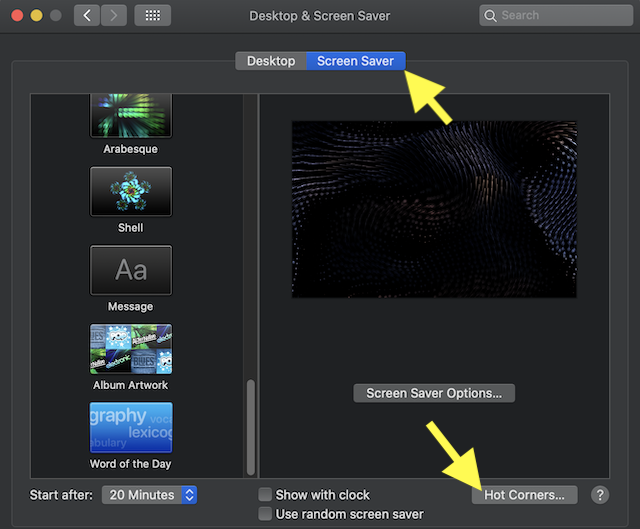
3. Next, select the corner you want to use in the drop-down menu and click on Start Screen Saver. Finally, click on OK to finish.
Create Screen Saver Shortcut Using Automator Quick Action
Though the Automator Quick Action/Service method is not as straightforward as the above-explained ways, it’s not complex either. So, you shouldn’t find it inconvenient even if you are yet to get a good hang of the Automator app.
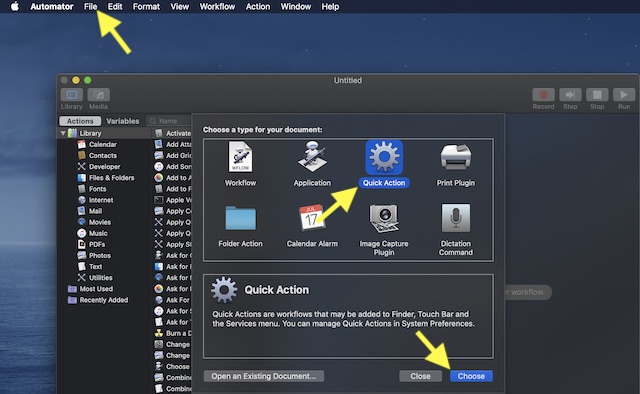
- Launch Automator on your Mac. (you can use the Spotlight search to quickly find the Automator app on your computer.) Then, click on New Document -> Quick Action -> Choose.
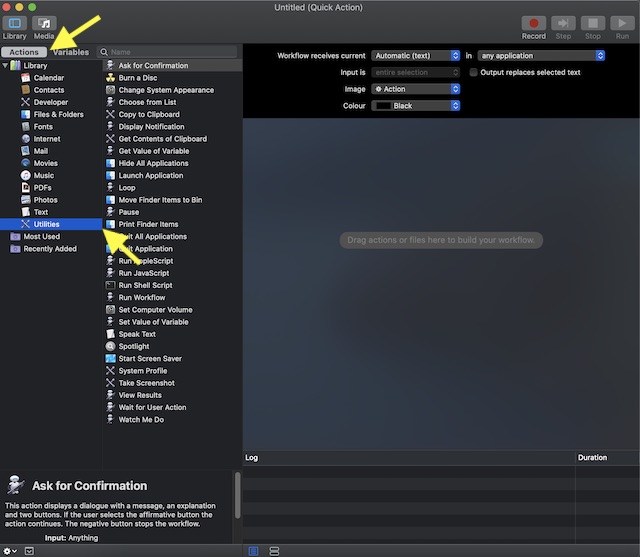
2. Now, click on Actions option at the top left corner and then choose Utilities.
3. Next, locate Start Screen Saver and drag it to the Workflow window on the right.
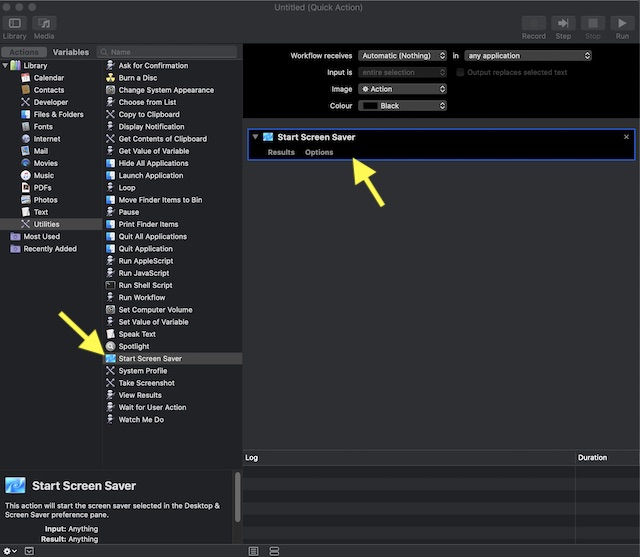
4. After that, click on the File menu and select Save. Then, give a suitable name to the workflow and click on Save.

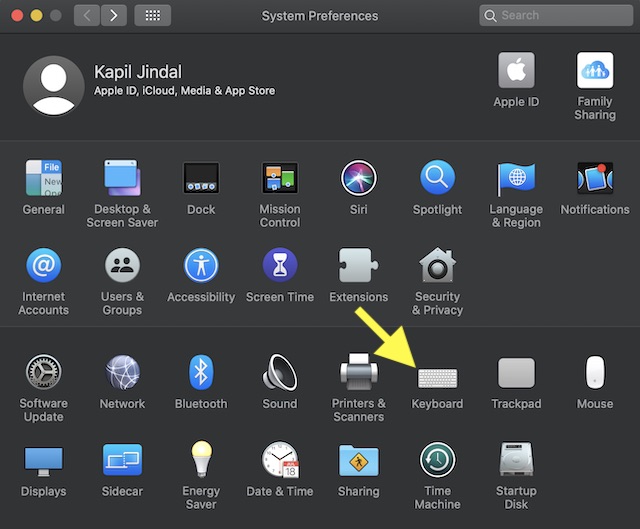
5. Next up, it’s time to set up a keyboard shortcut for it. To do so, launch System Preferences -> Keyboard.
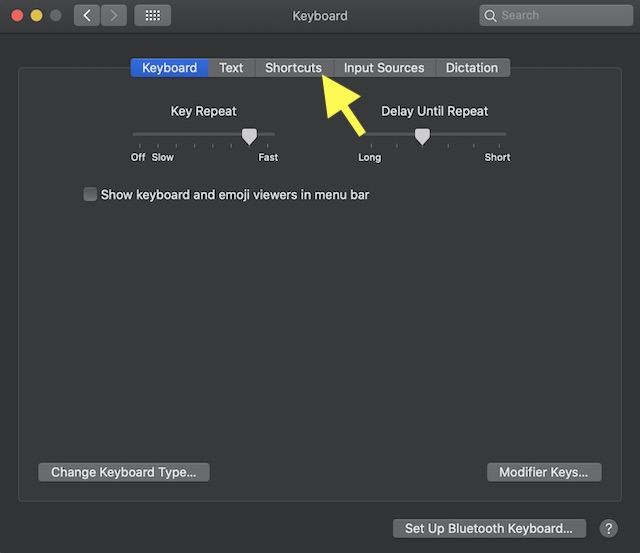
6. Now, click on the Shortcuts tab.
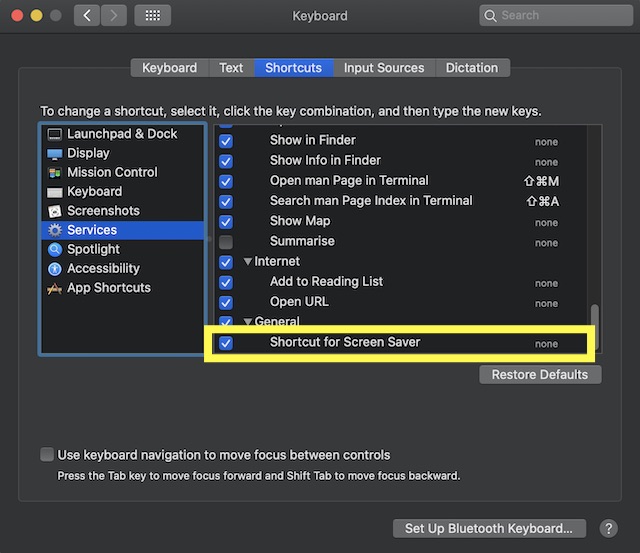
6. Now, click on Services on the left. Then, scroll down to the bottom and click on None to the right of the Quick Action/Service you have just created.
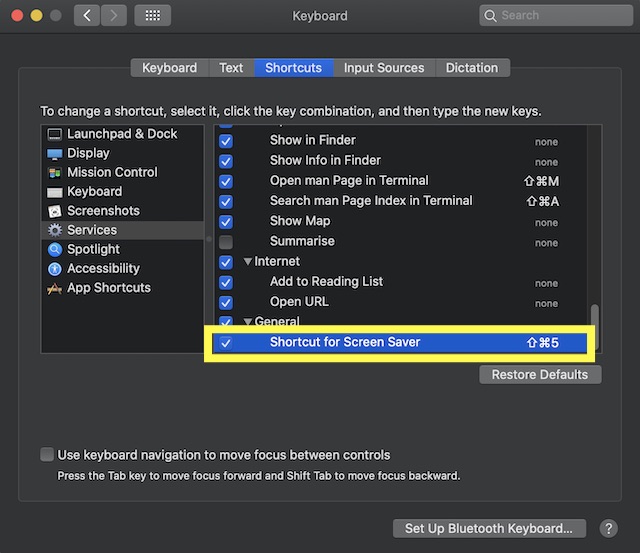
After that, enter the desired keyboard combination. Make sure to choose the keyboard combination that’s not being used.
Create Screen Saver Shortcuts for Mac
So, these are the cool screen saver shortcuts for Mac. I hope you have found these hacks quite helpful. From what I can tell, they can prove to be pretty handy in letting you get the most out of screen savers. Just in case, you have missed out on some of the equally interesting tricks that we have covered recently, I would recommend you check out how to automatically resize images using Automator Quick Action and how to turn off/on dark mode using a switch on Mac. By the way, feel free to share your feedback and also tip us if you know any such cool hacks.
from Beebom https://ift.tt/2OS9nC9


0 comments
Posts a comment